
So, you’ve decided to embark on a quilting journey, but you’re not quite sure where to begin. No worries, my friend, because today we’re going to explore the exciting world of quilting for beginners. Whether you’re a complete novice or have some basic sewing skills, this article will guide you through the essential steps of starting a quilt. So grab your fabric, thread, and sewing machine, and let’s get ready to create something beautiful and meaningful together!


Choosing the Right Fabric
Choosing the right fabric is essential when starting a quilt. You want to select fabric that is of good quality to ensure your quilt will last for years to come. Look for fabric that feels durable and has a tight weave. Cotton is a popular choice for quilting because it is easy to work with and comes in a wide range of prints and colors. Consider the intended use of your quilt and choose fabric that fits the desired aesthetic and level of durability.
Consider Fabric Quality
When choosing fabric for your quilt, pay attention to the quality. Look for fabric that feels sturdy and has a tight weave. This will ensure that your quilt will hold up well over time. Avoid fabric that feels flimsy or has loose threads. Quality fabric will make a noticeable difference in the finished product of your quilt.
Select the Quilt Pattern
Before you begin, it’s important to choose a quilt pattern that suits your skill level and preferences. There are countless quilt patterns to choose from, ranging from simple designs to complex ones. For beginners, it’s recommended to start with a basic pattern that uses squares or rectangles. As you gain more experience, you can explore more intricate patterns. Look for patterns that provide clear instructions and diagrams to guide you through each step.
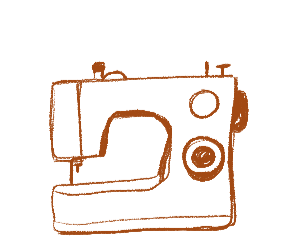
Gather Essential Tools and Supplies
To start a quilt, you’ll need a few essential tools and supplies. These include a cutting mat, rotary cutter, quilting ruler, fabric scissors, pins, and a sewing machine. The cutting mat provides a stable surface for cutting fabric, while the rotary cutter and quilting ruler help you achieve precise measurements. Fabric scissors are used for more detailed cutting, and pins are essential for holding fabric together while sewing. A sewing machine will save you time and effort, but hand-sewing can also be used if preferred.
Preparing the Fabric
Before you begin cutting and sewing, it’s important to prepare your fabric properly. This involves prewashing and ironing the fabric to ensure it is clean, preshrunk, and flat.
Prewash and Iron the Fabric
Prewashing your fabric before quilting is crucial because it removes any chemicals or dirt that may be present. It also pre-shrinks the fabric, preventing unwanted shrinkage after your quilt is complete. Follow the fabric manufacturer’s instructions for washing and drying. Once your fabric is clean and dry, iron each piece to remove any creases or wrinkles. This will make it easier to cut and sew accurately.
Cutting the Fabric Pieces
Once your fabric is prepped, it’s time to cut the pieces for your quilt. Using a rotary cutter, quilting ruler, and cutting mat, measure and cut the fabric according to your quilt pattern’s instructions. Take your time to ensure accurate measurements and straight lines. Double-check your measurements before making any cuts to avoid any mistakes.
Labeling and Organizing the Fabric
To keep your fabric organized throughout the quilting process, it’s helpful to label each piece. Use small fabric labels or pieces of masking tape to mark the measurements or purpose of each fabric piece. This will save you time and confusion later when assembling the quilt.
Creating the Quilt Design
Creating the quilt design is where your creativity comes into play. There are a few key decisions to make when designing your quilt: the quilt block size, the layout or design, and the quilt block arrangements.
Decide on the Quilt Block Size
The quilt block size determines the size of each individual block in your quilt. Consider the intended use of your quilt and the complexity of your chosen pattern when deciding on the size. Larger blocks can make assembly quicker, but smaller blocks may allow for more intricate designs.
Choose a Layout or Design
The layout or design of your quilt refers to the overall arrangement of the quilt blocks. You can choose a traditional layout, such as a simple grid or alternating blocks, or opt for a more creative and unique design. Consider the aesthetic you want to achieve and how the design will showcase your chosen fabrics.
Experiment with Quilt Block Arrangements
Before finalizing your quilt design, it’s a good idea to experiment with different quilt block arrangements. Lay out your blocks on a flat surface or use design software to visualize how they will look once stitched together. Play around with different arrangements to find the one that you like best. Don’t be afraid to try something new and take risks with your design.
Piecing the Quilt Top
Once you have finalized your quilt design, it’s time to piece the quilt top. This involves sewing the quilt blocks together, pressing the seams, and assembling the quilt top.
Sewing the Quilt Blocks
Take your first two quilt blocks and pin them right sides together along one edge. Sew along the pinned edge, using a 1/4-inch seam allowance. Repeat this process for the remaining quilt blocks until all blocks are sewn together in rows. Then, sew the rows together to complete the quilt top.
Pressing the Seams
Pressing the seams is an important step in quilting because it ensures that your quilt top lays flat and looks neat. After sewing each seam, use an iron to press the seams flat. This will help the blocks fit together smoothly and prevent any puckering or bulging.
Assembling the Quilt Top
Once all the quilt blocks are sewn together and the seams are pressed, it’s time to assemble the quilt top. Lay out the quilt blocks in the final design you chose and pin them together. Sew along the edges, using a 1/4-inch seam allowance, to create the complete quilt top.
Adding Borders
Borders add a finishing touch to your quilt and frame the design. It’s important to measure and cut the border fabric accurately to ensure a professional-looking finish.
Measure and Cut the Border Fabric
To add borders to your quilt top, measure the width and length of the quilt top. Cut strips of border fabric to match these measurements, adding an additional 1/2 inch to each strip for seam allowance. Pin and sew the border strips to the edges of the quilt top, mitering the corners for a clean look.
Sewing the Border to the Quilt Top
Align the border strips with the edges of the quilt top, right sides together. Pin the border in place and sew along the edges, using a 1/4-inch seam allowance. Press the border seam away from the quilt top. Repeat this process for all sides of the quilt top.
Creating the Quilt Sandwich
The quilt sandwich refers to the layers of the quilt: the quilt top, batting, and backing. Properly preparing and layering these components is essential for a well-finished quilt.
Prepare the Quilt Backing
The quilt backing is the fabric that forms the back of the quilt. It should be larger than the quilt top to allow for quilting and binding. Trim and square the backing fabric, removing any excess or uneven edges. Iron the fabric to remove any wrinkles or creases.
Layering the Quilt
Layering the quilt involves placing the quilt backing, batting, and quilt top together. Start by laying the quilt backing flat on a clean surface, wrong side up. Smooth out any wrinkles or folds. Next, place the batting on top of the backing, ensuring it is centered and flat. Finally, carefully place the quilt top on the batting, right side up. Smooth out any wrinkles or bubbles.
Basting the Quilt Layers
Basting is the process of securing the layers of the quilt together before quilting. There are several methods of basting, including using curved safety pins, spray basting, or hand basting. Choose the method that works best for you and secure the layers together at regular intervals to prevent shifting or bubbling.
Quilting the Layers
Quilting is the step where you stitch the layers of the quilt together, adding texture and securing the layers for durability. There are various quilting techniques to choose from, including hand quilting and machine quilting.
Choose a Quilting Technique
Hand quilting involves stitching through the layers of the quilt by hand, creating small, even stitches. This technique adds a charming, handmade touch but can be time-consuming. Machine quilting, on the other hand, involves using a sewing machine to stitch through the layers with a decorative or functional stitch. This technique is faster but may require some practice to achieve even results.
Marking Guidelines for Quilting
Before quilting, it’s important to mark guidelines on your quilt top to help you stay on track. These guidelines can be achieved by using tailor’s chalk, a washable fabric pen, or quilting stencils. Mark lines or patterns according to your desired quilting design.
Hand Quilting or Machine Quilting
Once your guidelines are marked, you can begin quilting. If you choose hand quilting, thread a quilting needle with a strong quilting thread and secure the thread with a knot. Stitch through the layers along the marked guidelines, creating small even stitches. If you opt for machine quilting, select a coordinating thread color and choose a quilting stitch on your sewing machine. Stitch along the marked guidelines, following the pattern or design you have chosen.
Binding the Quilt
Binding serves as the finished edge of your quilt, covering the raw edges and securing the layers together. It gives the quilt a polished look and adds durability.
Prepare the Binding Strips
To prepare the binding strips, cut fabric strips that are approximately 2.5 inches wide and long enough to go around the perimeter of the quilt. Join the strips together using a diagonal seam to create one continuous strip. Iron the strips in half lengthwise to create binding that is 1.25 inches wide.
Attaching the Binding to the Quilt
Starting in the middle of one side of the quilt, align the raw edges of the binding with the raw edges of the quilt. Pin the binding in place and sew along the edge, using a 1/4-inch seam allowance. Miter the corners by folding the binding at a 45-degree angle and continuing to sew along the next edge. Once you reach the starting point, trim the excess binding and fold it over the raw edges. Stitch the folded edge of the binding to the back of the quilt, either by hand or with a machine.
Finishing Touches
To complete your quilt, there are a few finishing touches you can add to make it truly unique.
Trimming Excess Fabric and Threads
Once your quilt is fully bound, carefully trim any excess fabric or threads that may be sticking out. This will give your quilt a clean and professional finish.
Adding Quilt Labels and Signatures
Adding a quilt label is a great way to personalize your quilt and provide information about its maker and date of creation. Use fabric markers, embroidery, or applique to create a label with your name, the date, and any other special messages or details you want to include. You can also consider adding a signature block, where you and anyone involved in the quilt’s creation can sign their names.
Creating a Hanging Sleeve
If you plan to hang your quilt, creating a hanging sleeve is essential. This sleeve allows you to insert a rod or dowel, making it easier to display your quilt. Cut a strip of fabric that is about 8 inches wide and the same width as your quilt. Fold the strip in half lengthwise, right sides together, and sew along the long edge. Turn the sleeve right side out and iron it flat. Attach the sleeve to the back of the quilt, about 1 inch below the top edge.
Caring for Your Quilt
Proper care and maintenance are key to preserving the beauty and longevity of your quilt.
Proper Washing and Drying
When it comes to washing your quilt, follow the instructions provided by the fabric manufacturer. Most quilts can be washed on a gentle cycle with mild detergent. Avoid using harsh chemicals or bleach. Once washed, lay the quilt flat to dry or hang it on a clothesline. Avoid drying it in direct sunlight, as this can cause fading.
Storing Your Quilt
When not in use, it’s important to store your quilt properly to prevent damage. Keep it in a cool, dry place, away from direct sunlight and moisture. Fold the quilt carefully to avoid excessive creasing, or roll it up for easier storage. If possible, place acid-free tissue paper between the folds to prevent any color transfer.
Starting a quilt for beginners may seem daunting at first, but breaking the process down into manageable steps makes it much more approachable. By choosing the right fabric, preparing it correctly, designing the quilt, piecing the top, adding borders, creating the quilt sandwich, quilting the layers, binding the quilt, and adding the finishing touches, you’ll create a beautiful quilt that you can be proud of. With proper care and maintenance, your quilt will bring warmth and beauty to your home for years to come. So gather your supplies, let your creativity flow, and embark on this exciting quilting journey. Happy quilting!