Whether you’re a beginner or an experienced sewist looking to refresh your skills, understanding the 8 basic sewing skills is essential to successfully complete any sewing project. From threading a needle to mastering the art of backstitching, these fundamental skills form the foundation for all sewing endeavors. Stick around as we break down each skill, providing you with the knowledge and confidence needed to tackle your next sewing project with ease. So grab your fabric, thread, and sewing machine, because you’re about to embark on a journey of learning and creativity!

1. Threading a sewing machine
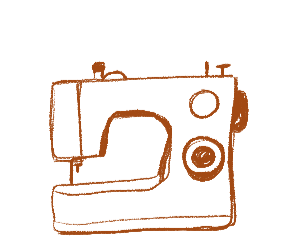
Understanding the parts of a sewing machine
Before you can start sewing, it’s important to familiarize yourself with the different parts of a sewing machine. This includes the presser foot, needle, bobbin, bobbin case, and tension dial. Understanding how each part works and where it is located will make threading the machine much easier.
Preparing the bobbin
To start threading your sewing machine, you’ll need to prepare the bobbin. The bobbin holds the lower thread and is essential for creating stitches. Begin by winding the thread onto the bobbin using a bobbin winder. Make sure the thread is wound evenly and snugly.
Threading the bobbin case
Once the bobbin is prepared, it needs to be placed into the bobbin case. Take the bobbin and insert it into the case according to your sewing machine’s instructions. Make sure the thread is threaded through the appropriate slots or tension areas on the bobbin case. This will ensure that the thread feeds smoothly when sewing.
Threading the needle
After the bobbin is in place, it’s time to thread the needle. Start by raising the presser foot and using your hand wheel to bring the needle to its highest position. Take the end of the upper thread and pass it through the thread guide(s) and tension dial, making sure to follow the correct threading path outlined in your machine’s manual. Finally, thread the needle from front to back, leaving a long tail of thread.
Checking the tension
Before you start sewing, it’s important to check the tension of your machine. The tension dial controls how tight or loose the stitches will be. Ideally, the tension should be set to a middle range, but you may need to adjust it depending on the fabric you’re using. Test the tension by sewing a few stitches on a scrap piece of fabric and checking if the stitches are even and balanced. Adjust as needed.
2. Sewing straight stitches
Using the presser foot and needle position
When sewing straight stitches, it’s important to ensure that the fabric is guided accurately. This can be achieved by using the presser foot, which holds the fabric in place, and adjusting the needle position to the desired width. Position the fabric under the presser foot, aligning the edge with the seam allowance or guide on the machine.
Setting stitch length
To create straight stitches, you’ll need to set the stitch length. This determines how far apart each stitch will be. For most general sewing projects, a stitch length of 2.5 to 3 is ideal. Adjust the stitch length according to your preferences and the fabric you’re working with. Test the stitch length on a scrap piece of fabric before sewing on your project.
Guiding the fabric
To sew straight stitches, guide the fabric by gently holding it with both hands. Use your left hand to guide the fabric from behind the presser foot, keeping the fabric aligned with the seam allowance or guide on the machine. Your right hand should be placed on the side of the fabric, helping to guide it evenly.
Maintaining an even stitch length
To achieve even stitch lengths, maintain a consistent speed while sewing. This will help ensure that the stitches are evenly spaced and not too tight or too loose. Practice sewing straight lines on scrap fabric to develop a steady and consistent sewing speed. Remember to breathe and relax to avoid tension in your hands, which can affect your stitch length.
Backstitching to secure stitches
To secure your straight stitches and prevent them from unraveling, it’s important to backstitch at the beginning and end of each seam. Backstitching involves sewing a few stitches forward, then sewing back over them, before continuing with regular stitching. This reinforces the stitches and provides added stability to your seams. Pay attention to the specific backstitching method recommended by your machine’s manual.
3. Sewing curved stitches
Understanding pivot points
When sewing curved stitches, it’s important to understand and identify pivot points. Pivot points are specific spots on the fabric where the sewing direction changes. These can be corners or curves. By lifting the presser foot and rotating the fabric at the pivot point, you can maintain a smooth and even stitch line around curves.
Marking the curve
Before sewing curved stitches, it can be helpful to mark the curve on your fabric. This can be done using tailor’s chalk or washable fabric markers. Marking the curve helps to guide the fabric and maintain a smooth line while sewing. Make sure to use a marking tool that is easily removable and doesn’t leave any permanent marks on the fabric.
Guiding the fabric smoothly
When sewing curved stitches, it’s important to guide the fabric smoothly to maintain the desired shape. Use your hands to gently curve the fabric as you sew, following the marked curve or sewing guide on your machine. Take your time and be patient, allowing the fabric to naturally ease into the curve and avoiding any tugging or pulling.
Using pins or clips
To ensure that your curved stitches stay in place while sewing, you can use pins or clips to secure the fabric layers together. Place the pins or clips perpendicular to the seam line, making sure they don’t interfere with the sewing machine’s needle. This will help prevent any shifting or distortion of the fabric as you sew around the curve.
Practicing on scrap fabric
Curved stitches can be challenging, especially for beginners. To build confidence and improve your skills, practice sewing curved stitches on scrap fabric before attempting them on your project. This will allow you to experiment with different techniques and make any necessary adjustments without the risk of ruining your final piece.
4. Sewing zigzag stitches
Adjusting the stitch width and length
Zigzag stitches are versatile and can be used for a variety of purposes, such as finishing fabric edges or creating decorative designs. To sew zigzag stitches, start by adjusting the stitch width and length on your sewing machine. The stitch width determines how wide the zigzag stitch will be, while the stitch length determines the distance between each zigzag point. Experiment with different settings to achieve the desired effect.
Using zigzag for finishing edges
A common use for zigzag stitches is finishing raw fabric edges to prevent fraying. Align the raw edge of the fabric with the center of the presser foot and sew a zigzag stitch along the edge. This will encase the raw edge and provide a neat and durable finish. Remember to choose a stitch width and length that is appropriate for the fabric you’re working with.
Sewing buttonholes
Another useful application of the zigzag stitch is sewing buttonholes. Most sewing machines have a specific buttonhole setting or foot that you can use for this purpose. Follow the instructions in your machine’s manual to select the appropriate setting and attach the buttonhole foot. Once everything is set up, position the fabric under the foot and sew the buttonhole, making sure to stop at the appropriate points.
Creating decorative stitches
Zigzag stitches can also be used to create decorative designs on fabric. This is especially useful for embellishing garments or adding unique touches to your sewing projects. Experiment with different stitch widths, lengths, and patterns to create your own custom decorative stitches. Remember to test the stitches on scrap fabric before sewing on your project to ensure the desired result.
Securing stretchy fabrics
Zigzag stitches are particularly useful when working with stretchy fabrics. The zigzag stitch allows the fabric to stretch without breaking the stitches. When sewing stretchy fabrics, choose a zigzag stitch with a wide stitch width and medium stitch length. This will provide enough flexibility for the fabric to stretch and prevent the stitches from snapping under tension.
5. Sewing a seam
Aligning fabric edges
When sewing a seam, it’s important to align the edges of your fabric before stitching. This ensures that the seam is straight and even. Match the raw edges of the fabric, right sides together, and use pins or clips to hold them in place. Take care to align any notches or markings on the fabric to ensure accurate matching.
Choosing seam allowances
A seam allowance is the distance between the stitch line and the raw edge of the fabric. The standard seam allowance is usually 5/8 of an inch, but it can vary depending on the project and personal preference. Before sewing the seam, determine the appropriate seam allowance and mark it on your fabric. This will serve as a guide for sewing straight and consistent seams.
Pinning or basting the seam
To keep the fabric layers secure while sewing the seam, you can use pins or basting stitches. Pins should be inserted perpendicular to the seam line and placed at regular intervals along the seam. Basting stitches are long temporary stitches that hold the fabric layers together. Basting can be done by hand or using the longest stitch length on your sewing machine.
Stitching the seam
Once the fabric is aligned and secured, it’s time to sew the seam. Place the fabric under the presser foot, aligning the edge with the desired seam allowance. Lower the presser foot and begin sewing, making sure to backstitch at the beginning and end of the seam to secure the stitches. Follow the marked seam allowance or use the edge of the presser foot as a guide for an even seam.
Pressing and finishing the seam
After sewing the seam, it’s important to press it to ensure a professional finish. Pressing helps to set the stitches and smooth out any wrinkles or puckers. Use an iron on the appropriate heat setting for your fabric and press the seam open or to one side as needed. Finish the seam by either serging the raw edges, zigzag stitching to prevent fraying, or using other edge finishing techniques.
6. Hemming and finishing edges
Measuring and marking the hem
Hemming is the process of finishing the raw edge of a garment or fabric piece. To start hemming, measure the desired hem length by turning up the fabric and pinning or marking it in place. Consider using the appropriate hemming technique for your project, such as a single or double-fold hem. Allow for seam allowances and any additional fabric needed for a clean finish.
Sewing a basic hem
Once the hem is measured and marked, it’s time to sew it in place. For a basic hem, fold the fabric up to the marked line, tuck the raw edge under, and pin or clip the hem in place. Choose a suitable stitch, such as a straight stitch or blind hem stitch, and sew along the folded edge, removing the pins or clips as you go. Trim any excess fabric if necessary.
Using blind hem stitches
A blind hem stitch is commonly used for creating invisible hems. This stitch allows the thread to blend into the fabric, making the hem virtually undetectable from the right side. Consult your machine’s manual for instructions on how to set up and use the blind hem stitch. Practice on scrap fabric to ensure the stitch is appropriately adjusted before sewing on your project.
Creating rolled hems
Rolled hems are often used for lightweight or delicate fabrics. To sew a rolled hem, fold the raw edge of the fabric twice to create a narrow hem, then stitch close to the folded edge. Depending on your machine, there may be a specific rolled hem foot available for this purpose. Practice on scrap fabric to achieve the desired width and stitch consistency.
Using edge finishes (serging, zigzag, etc.)
In addition to hems, there are various ways to finish raw fabric edges to prevent fraying. Serging, also known as overlocking, is a popular method that utilizes a serger machine to enclose the raw edge with stitches. Alternatively, you can use a zigzag stitch or a specialized edge finish foot on your sewing machine to create a clean and durable edge. Experiment with different techniques to find the one that works best for your project.
7. Sewing buttons and buttonholes
Marking button placements
Before sewing buttons, it’s important to mark their placement on your fabric. Use tailor’s chalk or washable fabric markers to make clear and accurate markings. Take into account the size and spacing of the buttons, as well as any specific buttonhole placement requirements. Double-check your markings to ensure you accurately position the buttons.
Sewing flat buttons
To sew flat buttons onto fabric, thread a needle and knot the end. Position the button over the marked placement, aligning it with the buttonhole. Insert the needle through one of the buttonholes, then through the fabric and the opposite buttonhole. Repeat this process several times, creating a secure X-shaped stitch pattern behind the button. Finish by knotting the thread on the wrong side of the fabric.
Creating thread shanks
Thread shanks are used when sewing buttons that require extra room for the button to pass through the buttonhole. To create a thread shank, insert a pin or a small, stack of needles between the fabric and the button before sewing. This elevates the button slightly and creates a gap, allowing enough space for the button to fit comfortably through the buttonhole.
Sewing buttonholes by hand
For garments or projects that require hand-sewn buttonholes, start by marking the desired buttonhole length and width on your fabric. Use a sharp needle and a thread that matches or complements your fabric color. Sew a line of tiny running stitches along the marked length, then go back over the stitches with blanket stitches. Reinforce the ends of the buttonhole with additional stitches for added strength.
Using a buttonhole foot
If your sewing machine has a buttonhole foot, it can simplify and speed up the process of creating buttonholes. Consult your machine’s manual for specific instructions on how to attach and use the buttonhole foot. Most machines will have a built-in buttonhole stitch that you can select. Follow the machine’s guidelines to create perfectly sized and evenly spaced buttonholes.
8. Sewing zippers
Choosing the right zipper
Choosing the right zipper for your project is essential to ensure a proper fit and functionality. Consider the length, color, and type of zipper you’ll need. Zippers come in various lengths and can be either invisible or visible. Select a zipper that matches your fabric and project requirements.
Marking zipper placement
Before sewing a zipper, it’s important to mark its placement on your fabric. Use chalk or washable fabric markers to make clear and accurate markings. Take into account the seam allowance and any design considerations. Double-check your markings to ensure the zipper will be centered and aligned correctly.
Using a zipper foot
A zipper foot is a specialized sewing machine foot designed to allow you to sew close to the zipper teeth. Attach the zipper foot to your sewing machine according to your machine’s instructions. This foot has an off-center groove that allows you to sew the zipper without the foot presser foot interfering. Ensure the needle aligns with the zipper teeth for accurate stitching.
Installing a centered zipper
To install a centered zipper, align the right side of the zipper tape with the marked zipper placement on the right side of the fabric. Use pins or clips to hold the zipper in place. Attach the zipper foot to your machine and sew one side of the zipper in place, starting at the top and working your way down. Repeat the process for the other side of the zipper, aligning it with the marked placement.
Sewing an invisible zipper
Invisible zippers are commonly used for garments where a seamless finish is desired. To sew an invisible zipper, position the right side of the zipper tape along the marked placement on the wrong side of the fabric. Ensure the zipper teeth align with the marked line. Attach the invisible zipper foot to your sewing machine and sew along the groove, stitching close to the teeth. Repeat for the other side of the zipper.
9. Sewing darts
Transferring dart markings
Darts are used to shape fabric by tapering it from a wider area to a narrower area. To sew darts, start by transferring the dart markings from your pattern onto the fabric using tailor’s chalk or washable fabric markers. These markings indicate the stitching lines and the widest point of the dart. Take care to transfer the markings accurately to ensure a well-shaped and balanced dart.
Stitching and pressing darts
To sew a dart, fold the fabric along the marked dart lines, aligning the edges. Start sewing from the widest point of the dart and sew along the line until you reach the narrowest end. Backstitch at the beginning and end for added durability. Press the sewn dart flat with an iron, following the direction given in your pattern or the desired outcome.
Working with different dart types
Darts can come in various shapes and sizes, depending on the pattern and the desired fit of your garment. Common dart types include single-point darts, double-point darts, and French darts. Each dart type has its own sewing method and considerations. Study and understand the specific instructions for the dart type you’ll be working with to achieve the desired result.
Reducing bulk
When sewing darts, it’s important to reduce bulk for a cleaner finish. Trim the excess fabric from the dart seam allowances by cutting them diagonally. This helps to reduce bulk and eliminate any potential bulk-related issues with the fabric layers. Be careful not to cut into the stitching line or weaken the dart.
Finishing dart ends
To finish the ends of your darts, backstitch at the beginning and end to secure the stitches. Backstitching prevents the stitches from unraveling or shifting over time. Trim any excess thread and press the dart flat with an iron to set the stitches and ensure a smooth finish.
10. Sewing gathers
Creating gathering stitches
Gathering is a technique used to create fullness or volume in a fabric or garment. To create gathering stitches, set your sewing machine to the longest stitch length. Sew two parallel lines of basting stitches along the area you want to gather, leaving long thread tails at both ends. These stitches will allow you to easily gather the fabric later on.
Distributing and adjusting gathers
To distribute and adjust the gathers, hold onto the thread tails at one end and gently push the fabric along the threads to create the desired fullness. Continue adjusting the gathers until the fabric is evenly distributed. Space the gathers evenly by adjusting the thread tails and pushing the fabric along the threads as needed.
Using gathering foot or technique
Some sewing machines have a special gathering foot that can make the gathering process easier. Consult your machine’s manual for instructions on how to attach and use the gathering foot. If you don’t have a gathering foot, you can use the basting stitch method mentioned earlier to create gathers manually. Both methods will result in lovely and evenly distributed gathers.
Gathering fabric evenly
When creating gathers, it’s important to distribute the fullness evenly across the fabric. This ensures that the gathers are balanced and don’t bunch or pucker in one area. Take your time and distribute the gathers evenly by adjusting the thread tails and pushing the fabric along the threads as needed. Step back and check the fabric from a distance to ensure that the gathers are consistent.
Securing gathers in place
Once you’re satisfied with the placement of your gathers, secure them in place before attaching the gathered piece to another fabric. To do this, hold onto the thread tails at one end and gently tug on them to gather the fabric even further. Tie the thread tails in a knot to secure the gathers. This will prevent the gathers from coming undone while you sew or manipulate the fabric further.
Congratulations! You’ve learned the 10 basic sewing skills that will help you embark on your sewing journey with confidence. Remember, practice makes perfect, so don’t be discouraged if it takes time and effort to master these techniques. Each skill builds upon the previous one, and with dedication and patience, you’ll be creating beautiful and functional garments and projects in no time. Happy sewing!