If you’ve ever thought about picking up a new skill like sewing, you might be wondering where to start. With countless possibilities in the world of sewing, it can be overwhelming to decide where to begin. Luckily, there is one essential item that is the perfect starting point for beginners. In fact, it’s often considered the foundation of sewing knowledge. So, what is this magical first thing you should learn to sew? Let’s find out!
Basic Sewing Tools
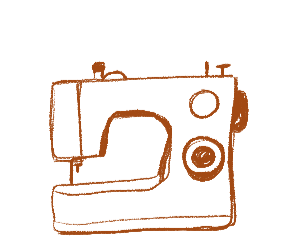
Sewing Machine:
A sewing machine is an essential tool for anyone who wants to pursue sewing as a hobby or even as a profession. It is a power-operated machine that automates the process of stitching fabrics together. With a variety of settings and stitches, a sewing machine allows you to create intricate designs and sew with precision. Whether you’re a beginner or an experienced sewer, investing in a good quality sewing machine will make your sewing projects much easier and more enjoyable.
Scissors:
When it comes to sewing, having a good pair of scissors is crucial. A sharp pair of fabric scissors allows you to make clean, precise cuts on your fabric without fraying or damaging the material. It’s important to have a dedicated pair of scissors for fabric and another pair for other purposes to ensure that your fabric scissors stay sharp and in good condition.
Pins:
Pins are small, slender tools with a sharp point on one end and a flat head on the other. They are used to hold fabric pieces together temporarily before stitching. Pins help in keeping the fabric in place and prevent any shifting or misalignment during the sewing process. There are different types of pins available, such as standard pins, glass-headed pins, and quilting pins, each designed for specific sewing needs.
Measuring tape:
Accurate measurements are essential in sewing. A measuring tape, also known as a tape measure, is a flexible ruler that is used to measure fabric, body measurements, and pattern dimensions. It is important to have a reliable measuring tape to ensure that your sewing projects have the correct fit and dimensions.
Fabric
Selecting Fabric:
Selecting the right fabric for your sewing project is crucial. The choice of fabric can greatly affect the outcome and functionality of your garment or project. When selecting fabric, consider factors such as the weight, drape, durability, and care instructions. It’s also important to consider the purpose of your project and choose a fabric that suits your needs.
Types of Fabric:
There are countless types of fabrics available, each with its own unique characteristics and uses. Some common types of fabric include cotton, polyester, silk, linen, and denim. Each fabric has its own advantages and disadvantages, so it’s important to learn about different types of fabrics and their properties to make informed decisions when choosing fabric for your sewing projects.
Cotton:
Cotton is a popular fabric choice for sewing because it is breathable, comfortable, and absorbent. It is widely available and comes in various weights and finishes. Whether you’re sewing a dress, a quilt, or home decor items, cotton is a versatile fabric that can be used for a wide range of projects.
Polyester:
Polyester is a man-made fabric that is known for its durability and wrinkle resistance. It is often blended with other fibers to enhance its properties. Polyester is commonly used for sewing garments, such as dresses, blouses, and activewear, as it provides strength and stability to the fabric.
Seams and Stitching
Types of Seams:
Seams are the lines where two or more pieces of fabric are stitched together. There are various types of seams, each serving a different purpose and creating a different aesthetic. Some common types of seams include straight seams, French seams, flat-felled seams, and overlock seams. The type of seam you choose will depend on the fabric, the project, and the desired outcome.
Straight Stitch:
The straight stitch is one of the most basic and commonly used stitches in sewing. It is a simple, straight line of stitching that joins two pieces of fabric together. The straight stitch is versatile and can be used for a wide range of sewing projects, from garment construction to quilting. It is important to adjust the stitch length according to the thickness and type of fabric you’re working with to achieve the desired result.
Zigzag Stitch:
The zigzag stitch is another commonly used stitch in sewing. It creates a zigzag pattern and is often used to finish raw fabric edges, prevent fraying, and reinforce seams. The zigzag stitch is particularly useful when sewing stretchy or knitted fabrics, as it allows the fabric to stretch without breaking the stitches.
Threading the Sewing Machine
Threading the Needle:
Threading the needle of a sewing machine can be a bit tricky, especially for beginners. Start by ensuring that the sewing machine is powered off and the needle is in the highest position. Cut a small piece of thread and pass it through the thread guide, then through the tension discs. Thread the needle from front to back, making sure the thread passes through the eye of the needle. Pull the thread towards the back of the machine, leaving a tail of a few inches.
Bobbin Threading:
The bobbin is a small spool of thread that holds the thread supply for the underside of the fabric. Threading the bobbin is an important step in setting up your sewing machine. Start by removing the bobbin case from the machine and placing the bobbin inside it, ensuring that the thread unwinds in the correct direction. Pull the thread through the designated slot and guide it through the tension spring. Finally, reinsert the bobbin case into the machine, making sure it is securely in place.
Hand Stitches
Whip Stitch:
The whip stitch is a versatile hand stitch that is often used for joining two pieces of fabric together or finishing raw fabric edges. To whip stitch, start by aligning the edges of the fabric. Insert the needle from the back of the fabric, bringing it up and over the edge of the fabric. Repeat this motion, creating a series of small diagonal stitches along the edge of the fabric. The whip stitch is a quick and secure way to join fabric pieces, making it ideal for various sewing projects.
Slip Stitch:
The slip stitch, also known as the blind stitch, is an invisible hand stitch that is used for hemming, attaching trims, and closing openings in garments or other fabric items. To slip stitch, bring the needle up through the folded edge of the fabric, catching only a few threads of the fabric surface. Then, insert the needle into the opposite folded edge and repeat the process, creating a series of invisible stitches that hold the fabric together. With practice, the slip stitch can create seamless and invisible finishes.
Running Stitch:
The running stitch is one of the simplest and most versatile hand stitches. It is a basic stitch that is commonly used for basting, gathering fabric, and temporary stitching. To sew a running stitch, bring the needle up through the fabric, then insert it back down a short distance away, creating evenly spaced stitches along the fabric. The running stitch is quick and easy to sew, making it a great stitch for beginners or for quick repairs.
Sewing Straight Lines
Using a Guide:
Sewing straight lines can be challenging, especially when you’re working with long seams. Using a guide can help you sew straight lines with ease. A guide can be as simple as a strip of masking tape or a magnetic guide attached to your sewing machine. Align the edge of the fabric with the guide, ensuring that the fabric stays straight as you sew. This will help you maintain a consistent seam allowance and prevent your stitches from veering off track.
Practicing with Scrap Fabric:
Practicing sewing straight lines on scrap fabric is a great way to improve your stitching skills. Cut a piece of scrap fabric and draw lines or grids on it using a ruler or a fabric marking pen. Practice sewing along the lines, focusing on keeping your stitches straight and consistent. This will help you develop muscle memory and gain confidence in sewing straight lines.
Sewing Curved Lines
Using an Interfacing:
When sewing curved lines, using an interfacing can help stabilize the fabric and prevent it from stretching or distorting. An interfacing is a lightweight fabric that is sewn or fused to the wrong side of the fabric. It adds structure and stability to the fabric, making it easier to sew smooth, even curves. Choose an interfacing that is suitable for your fabric and follow the manufacturer’s instructions for applying it.
Pinning and Stitching:
Pinning is essential when sewing curved lines. Start by aligning the fabric pieces with right sides together. Use pins to secure the fabric along the curve, making sure that the pins are perpendicular to the curve. This will help hold the fabric in place and prevent any shifting or puckering. Slowly stitch along the curve, removing the pins as you go. Take your time and pivot the fabric as needed to maintain a smooth and even curve.
Hemming
Types of Hems:
Hemming is the process of folding and sewing the edge of a fabric to prevent it from fraying and give it a clean, finished look. There are different types of hems that you can use, depending on the project and the desired outcome. Some common types of hems include single fold hems, double fold hems, blind hems, and rolled hems. Each type of hem has its own technique and application.
Single Fold Hem:
A single fold hem is a simple and quick way to finish the raw edge of a garment or other fabric item. To create a single fold hem, fold the fabric edge once towards the wrong side, aligning the raw edge with the desired hemline. Press the fold in place to create a crisp crease, then stitch along the folded edge to secure the hem.
Double Fold Hem:
A double fold hem is a more durable and professional-looking hem finish. To create a double fold hem, fold the fabric edge twice towards the wrong side, first folding it in about half of the desired hem width, and then folding it again to encase the raw edge. Press each fold in place, creating crisp creases, and stitch along the folded edge to secure the hem. A double fold hem provides extra stability and prevents any fraying of the fabric edge.
Creating Basic Projects
Tote Bag:
A tote bag is a versatile and practical sewing project, suitable for beginners and experienced sewers alike. Tote bags can be customized to suit your style and needs, and they make great gifts or personal accessories. To sew a basic tote bag, you’ll need fabric, a sewing machine, and basic sewing supplies. Cut out two rectangles of fabric for the main body of the bag and two smaller rectangles for the handles. Sew the sides and bottom of the main body, attach the handles, and finish the raw edges. With some creativity and sewing skills, you can create a beautiful tote bag that is unique to you.
Pillowcase:
Sewing a pillowcase is a simple and satisfying project that can instantly update the look of your home decor. To sew a pillowcase, you’ll need fabric, a sewing machine, and basic sewing supplies. Cut a piece of fabric for the main body of the pillowcase and another piece for the cuff. Fold and sew the cuff, then attach it to the main body, right sides together. Finish the raw edges, turn the pillowcase right side out, and insert a pillow form. With a variety of fabric choices and personalized touches, you can create pillowcases that match your style and add a pop of color to your living space.
Simple Skirt:
Sewing a simple skirt is a great way to expand your sewing skills and create a versatile clothing item. To sew a simple skirt, you’ll need fabric, a sewing machine, and basic sewing supplies. Measure and cut the fabric according to your desired length and waist measurement. Sew the side seams, insert a waistband or elastic, and finish the hem. With some practice and attention to detail, you can sew skirts that fit you perfectly and reflect your personal style.
Troubleshooting
Understanding Tension:
Tension plays a crucial role in sewing. It refers to the balance between the upper thread and the bobbin thread. When the tension is properly adjusted, the stitches will be even and balanced. If the tension is too tight, the stitches may pucker or break. If the tension is too loose, the stitches may be loose or form loops on the fabric surface. Understanding how to adjust the tension on your sewing machine and how it affects your stitches will help you troubleshoot any tension-related issues.
Fixing Thread Tangles:
Thread tangles, also known as thread nests or bird’s nests, can occur when the threads get tangled up underneath the fabric while sewing. This can happen due to various reasons, such as incorrect threading, bobbin issues, or thread tension problems. When you encounter thread tangles, stop sewing and remove the fabric from the machine. Cut the threads close to the fabric and gently remove any tangles. Rethread the machine, ensuring that the threads are properly inserted in the tension discs and the bobbin is correctly threaded. Adjust the tension if necessary and test your stitches on a scrap fabric before continuing your project.
Replacing Broken Needles:
Needles can break while sewing, especially if you’re using the wrong type or size of needle or if you’re sewing through thick or heavy fabrics. When a needle breaks, stop sewing immediately, remove the broken needle fragments from the machine, and replace the needle with a new one. Make sure to choose a needle that is appropriate for your fabric and project. It’s important to regularly check your needles for any signs of wear or damage and replace them as needed to prevent any sewing mishaps.
Learning to sew can be a rewarding and enjoyable experience. By familiarizing yourself with the basic sewing tools, understanding different types of fabric, mastering various types of seams and stitches, and learning essential techniques like threading the machine and hand sewing, you’ll be well on your way to creating your own beautiful and functional projects. With practice and patience, you can expand your sewing skills and tackle more complex projects. Don’t be afraid to experiment and get creative with your sewing – the possibilities are endless! Happy sewing!