Have you ever wanted to try your hand at sewing, but felt unsure about where to start? Well, look no further! This article will guide you through the exciting world of sewing by revealing the first thing you should sew. Whether you’re a complete beginner or someone looking to refresh their sewing skills, this article has got you covered. So grab your fabric and thread, and let’s get stitching!
Choosing the Right Project
When you’re first starting out with sewing, it’s important to choose the right project that matches your experience level. Sewing can be a fun and fulfilling hobby, but starting with a complex project right away might feel overwhelming. Consider your current sewing skills and choose a project that aligns with your abilities.
Consider Your Experience Level
If you’re a complete beginner, it’s best to start with simple patterns and projects. These can help you understand the basic techniques and build your confidence. As you gain more experience and develop your skills, you can gradually move on to more complex projects. Remember, sewing is a skill that takes time and practice to master, so be patient with yourself and start small.
Start with Simple Patterns
Simple patterns are perfect for beginners as they often have fewer pieces to work with and require fewer advanced sewing techniques. Look for patterns labeled as “beginner-friendly” or “easy” to get started. These patterns typically include detailed instructions and illustrations to guide you through each step of the sewing process. Starting with simple patterns will help you understand the fundamentals of sewing before taking on more challenging projects.
Choose a Small and Quick Project
When selecting your first project, opt for something small and quick to complete. This allows you to experience the satisfaction of finishing a project sooner rather than later. Small projects, such as a drawstring bag or a pillowcase, can be completed in a short amount of time and give you a sense of accomplishment. This will motivate you to continue sewing and tackle more ambitious projects in the future.
Gathering Basic Sewing Supplies
Before you start sewing, it’s important to gather the necessary sewing supplies. Having the right tools and materials will make your sewing experience smoother and more enjoyable. Here are the basic sewing supplies you’ll need:
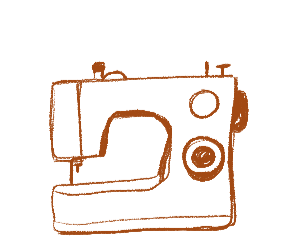
Sewing Machine
A sewing machine is a must-have for any sewing enthusiast. It allows you to stitch fabric quickly and precisely. Choose a sewing machine that fits your needs and budget. Entry-level sewing machines are often available at affordable prices and are suitable for beginners. Remember to read the manual and familiarize yourself with the machine’s functions before you start sewing.
Needles and Thread
Having a variety of sewing needles and threads is essential. Needles come in different sizes and types, such as universal needles and ballpoint needles, depending on the fabric you’re working with. Ensure you have a range of thread colors to match your fabric choices. Polyester thread is a good all-purpose option for most projects.
Scissors and Snips
Invest in a pair of quality fabric scissors for cutting fabric and a pair of small snips for trimming threads. It’s important to keep these tools sharp and dedicated solely to fabric cutting, as using them for other purposes can dull the blades and affect their performance.
Pins and Pin Cushion
Pins are used to hold fabric pieces together while sewing. Opt for straight pins with durable heads that won’t easily come off. Keep your pins neatly organized in a pin cushion so that they’re easily accessible while sewing.
Measuring Tape
A measuring tape is essential for taking accurate measurements and for ensuring your fabric pieces are cut to the correct size. Look for a flexible measuring tape that can easily wrap around curves and corners.
Iron and Ironing Board
Ironing is an important step in sewing as it helps create crisp seams and ensure a professional finish. Invest in a good-quality iron and an ironing board to properly press your fabric before and during the sewing process.
Seam Ripper
A seam ripper is a handy tool for correcting any mistakes or undoing stitches. Even experienced sewers make mistakes, so having a seam ripper within reach will save you time and frustration.
Preparing Fabric and Patterns
Before you start sewing, it’s crucial to properly prepare your fabric and understand the patterns you’ll be working with. Follow these steps to ensure a successful sewing project:
Washing and Ironing the Fabric
It’s important to pre-wash your fabric before sewing to remove any chemicals or sizing. This step helps prevent shrinkage or other unexpected changes in the fabric after the project is complete. After washing, iron the fabric to smooth out any wrinkles and create a flat surface for cutting and sewing.
Reading and Understanding Patterns
Patterns provide the instructions and guidance on how to sew your project. Take the time to carefully read and understand the instructions before you begin. Look for any markings or symbols on the pattern that indicate cutting lines, stitching lines, or side details. Understanding the pattern will help you avoid mistakes and ensure a successful outcome.
Transferring Pattern Markings
Once you’ve selected your pattern and have your fabric ready, it’s important to transfer any pattern markings onto the fabric. These markings help guide you in sewing accurately and positioning components correctly. Transfer the markings using fabric chalk or tailor’s chalk, making sure they’re clearly visible but won’t stain or damage the fabric.
Cutting Fabric Pieces
Using the pattern as your guide, carefully cut out the fabric pieces needed for your project. Take your time and cut precisely along the cutting lines, ensuring smooth and even edges. Use fabric weights or pins to hold the pattern in place while cutting, and make sure your scissors are sharp for clean cuts.
Learning Essential Sewing Techniques
To become a confident and skilled sewer, it’s important to learn and practice essential sewing techniques. These techniques will form the foundation of your sewing skills and allow you to tackle a wide variety of projects. Start with the following techniques:
Threading the Sewing Machine
Before you can start sewing with your machine, you need to learn how to properly thread it. Refer to your sewing machine manual for specific instructions, as threading processes can differ depending on the machine. Take your time to thread the machine correctly, ensuring the thread passes through all necessary guides and tensions.
Understanding Tension and Stitches
The tension setting on your sewing machine determines how tightly or loosely the threads are pulled when sewing. It’s important to understand how tension works and how to adjust it for different fabrics and desired stitch outcomes. Experiment with different tension settings and observe the results on scrap fabric before sewing on your project.
Different stitches offer various functions and finishes. Learn the basics of straight stitches, zigzag stitches, and overcasting stitches. Understand how stitch length and width can be adjusted to suit your project requirements.
Using the Backstitch
The backstitch is essential for securing stitches at the beginning and end of a seam. Learn how to backstitch to prevent your stitches from unraveling. Practice stitching a few lines forward and backward to familiarize yourself with this technique.
Sewing Straight and Even Seams
Sewing straight and even seams is a fundamental skill in sewing. Practice sewing along a marked line or using the edge of your presser foot as a guide. Take your time and guide the fabric evenly while keeping a steady speed on the sewing machine. Consistent practice will help you develop your sewing skills and create clean, professional-looking seams.
Making Zigzag and Overcasting Stitches
Zigzag stitches and overcasting stitches are used to finish raw edges, prevent fraying, and add durability to seams. Practice sewing these stitches on scrap fabric to master the technique. Experiment with different stitch widths and lengths to achieve the desired finish.
Creating Simple Seam Finishes
Seam finishes are techniques used to prevent raw edges from fraying. Depending on the fabric and project, there are various seam finishes to choose from, such as zigzag stitching, pinking, or using a serger. Practice different seam finishes on scrap fabric to determine which technique works best for your specific project.
Practicing Basic Hand Stitches
While using a sewing machine is the primary method for sewing, it’s important to have some basic hand stitching skills in your sewing arsenal. These hand stitches can be useful for finishing touches and repairs. Practice the following basic hand stitches:
Running Stitch
The running stitch is the most basic stitch and is used for general sewing purposes. It’s created by making evenly spaced, small stitches along a straight line. Practice stitching with even stitch lengths and maintaining straight lines.
Backstitch
The backstitch is a strong and reliable stitch used for joining fabric pieces together or for creating secure seams. Start with a small knot at the end of the thread and insert the needle slightly ahead of the last stitch. Bring the needle back to the end of the last stitch and continue with the next stitch, repeating the process.
Slipstitch
Slipstitch is a nearly invisible stitch used for joining two folded edges together, such as when hemming or closing a lining. Practice making small, nearly invisible stitches to achieve a clean and hidden finish.
Blind Hem Stitch
The blind hem stitch is used to create an invisible hem. This stitch is commonly used in garment construction or when hemming curtains or tablecloths. Practice folding the fabric and creating small, nearly invisible stitches to master this technique.
Basting Stitch
Basting stitches are temporary, long stitches used for holding fabric pieces together temporarily or for gathering fabric. Practice creating even and loose stitches that can be easily removed once they’ve served their purpose.
Sewing a Straight Line
Sewing a straight line is a foundational skill that is essential for almost every sewing project. Practice the following steps to sew a straight line with your sewing machine:
Preparing the Sewing Machine
Ensure your sewing machine is threaded correctly and that the necessary thread and needle are in place. Adjust the stitch length if needed, depending on your project requirements. Test the machine on scrap fabric to check the tension and stitch quality.
Setting the Fabric in the Machine
Place your fabric pieces with right sides together, aligning the raw edges you intend to sew. Use pins or clips to hold the fabric securely in place. Make sure your presser foot is in the down position before you start sewing.
Guiding the Fabric Accurately
Hold the fabric lightly by the edges and guide it gently through the sewing machine. As you sew, keep your eyes focused on your seam guide, such as the presser foot edge or marked seam allowance. Ensure the fabric is aligned and does not shift or stretch while sewing.
Maintaining a Consistent Seam Allowance
As you guide the fabric, pay attention to the seam allowance, which is the distance between your line of stitching and the fabric’s raw edge. Maintaining a consistent seam allowance throughout your sewing project will ensure even seams and a professional finish.
Finishing the Seam
After sewing your desired length, stop the machine with the needle in the down position to keep your fabric secure. Lift the presser foot and carefully remove the fabric. Trim any loose threads and press the seam flat with an iron. Congratulations! You’ve sewn your first straight line.
Creating a Drawstring Bag
A drawstring bag is a great beginner project that combines both sewing machine and hand-sewing skills. It’s a versatile project that can be used for storing small items, as a gift bag, or as a project bag for knitting or crochet. Follow these steps to create your own drawstring bag:
Understanding the Project
A drawstring bag consists of two fabric pieces, a drawstring channel, and a drawstring. The bag can be customized to your desired size and fabric choice. Keep the project simple by choosing a woven cotton fabric, as it’s easy to work with and beginner-friendly.
Gathering Materials
For this project, you’ll need fabric for the bag, coordinating thread, a length of cord or ribbon for the drawstring, and basic sewing supplies such as scissors, pins, and a sewing machine. Pre-wash and iron your fabric before starting.
Cutting and Preparation
Measure and cut two rectangles of fabric for the body of the bag. You can customize the size based on your preferences, but a beginner-friendly size might be around 10 inches by 12 inches. Pin the fabric pieces with right sides together, ensuring the raw edges are aligned and leave one short side open for turning.
Sewing the Bag
Using a straight stitch, sew along the three sides of the fabric, backstitching at the beginning and end for reinforcement. Leave the top short side open for turning the bag right side out.
Adding the Drawstring
Turn the bag right side out by pulling it through the open side. Press the bag flat with an iron. Fold the top opening down towards the inside by about half an inch to create the drawstring channel. Pin the fold in place. Sew around the folded edge, leaving a small opening to thread the drawstring through. Attach a safety pin to one end of the drawstring and insert it through the channel, pulling it all the way around and out through the opening. Knot the ends of the drawstring together, adjust the gathers to your liking, and close the opening.
Making a Pillowcase
Making a pillowcase is another beginner-friendly project that allows you to practice sewing straight lines and finishing techniques. Not only will you have a fun and functional item for your home, but you’ll also be able to personalize it with your choice of fabric and trim. Follow these steps to make your own pillowcase:
Choosing the Fabric and Trim
Select a soft cotton fabric for the main body of the pillowcase. Consider the color scheme and pattern that will match your home decor or personal style. Choose a contrasting or coordinating fabric for the trim, such as a solid color or a complementary pattern. You’ll also need coordinating thread and basic sewing supplies.
Measuring and Cutting
Measure the dimensions of your pillow, adding a half-inch seam allowance to each side. Cut one rectangular piece of fabric according to the pillowcase dimensions. For the trim, cut a strip of fabric that is twice the width of the pillowcase plus an inch, and three times the desired trim width. For example, if your pillowcase is 20 inches by 30 inches and you want a two-inch trim, cut the trim strip to be 41 inches by 6 inches.
Sewing the Seams
Fold the trim strip in half lengthwise, with right sides together. Sew along the long raw edge using a straight stitch, leaving the short ends open. Turn the trim strip right side out and press it flat. Fold the pillowcase fabric in half with right sides together. Sew along the side and bottom edges, leaving the top edge open. Trim the corners diagonally, being careful not to cut through the stitches. Turn the pillowcase right side out and press the seams flat.
Adding the Trim
Open the folded trim strip and align the raw edge with the top edge of the pillowcase, right sides together. Pin or clip the trim in place around the opening of the pillowcase. Sew along the raw edge, securing the trim to the pillowcase. Trim any excess trim fabric, if necessary, and turn the trim to the back side of the pillowcase. Press the seam flat.
Finishing Touches
Fold the pillowcase in half with right sides together, aligning the side and bottom seams. Pin or clip the side and bottom edges together. Sew along the pinned edges, backstitching at the beginning and end. Turn the pillowcase right side out and press it flat. Insert your pillow into the pillowcase, and you’re done! Enjoy your newly made pillowcase.
Sewing a Simple Skirt
Once you’ve mastered sewing straight lines and basic techniques, you can start creating garments. A simple skirt is a great beginner garment project that allows you to practice working with more fabric and constructing a wearable item. Follow these steps to sew a simple skirt:
Selecting the Fabric and Notions
Choose a fabric that drapes well and is suitable for a skirt, such as cotton, linen, or lightweight denim. Consider the fabric’s color, pattern, and texture based on your personal style and the occasion you’ll be wearing the skirt for. You’ll also need a zipper, thread to match your fabric, interfacing (if necessary), and necessary sewing supplies such as a sewing machine, scissors, and pins.
Taking Measurements
Measure your waist and hips accurately to determine the skirt size. Measure the desired skirt length from your waist to where you want the skirt to end. Add seam allowances and a hem allowance to your measurements. Use these measurements to create a basic skirt pattern, or choose a commercial skirt pattern that matches your size and skill level.
Cutting Out the Pieces
Transfer the skirt pattern onto your fabric by pinning it to the fabric and using fabric chalk or tailor’s chalk to mark the outline. Cut out the fabric pieces according to the pattern markings, making sure to transfer any notches or markings accurately.
Joining the Skirt Panels
With right sides together, pin or clip the skirt panels together at the side seams. Sew along the pinned edges, backstitching at the beginning and end to secure the seams. Press the seams open or towards one side, depending on your fabric and preference. Fit the skirt to ensure it fits properly and make any necessary adjustments.
Adding the Waistband
If your skirt pattern includes a waistband, follow the pattern instructions to attach it to the skirt. If your pattern does not include a waistband, you can create a simple waistband by measuring and cutting a strip of fabric that is about 2-3 inches wide and the same width as your waist measurement plus seam allowances. Fold the waistband in half lengthwise, with right sides together, and sew along the short edge to form a loop.
With the skirt right side out, align the raw edges of the waistband with the top edge of the skirt, right sides together. Pin or clip the waistband in place, making sure to distribute the fabric evenly. Sew along the pinned edge, backstitching at the beginning and end. Press the waistband and seam allowance up towards the waistband.
Finishing the Hem
Try on the skirt and determine the desired hem length. Mark the hemline accurately using fabric chalk or tailor’s chalk. Fold the raw edge of the fabric up to the marked hemline, wrong sides together, and press the fold. Pin or clip the hem in place and stitch along the fold using a straight stitch, backstitching at the beginning and end. Trim any excess fabric, if necessary, and press the hem flat. Your skirt is now complete and ready to wear!
Embarking on a Simple Quilting Project
Quilting allows you to combine sewing skills with creativity to create beautiful and functional items. Although quilting may seem more advanced than other sewing projects, starting with a simple quilting project can be both enjoyable and rewarding. Follow these steps to embark on a simple quilting project:
Selecting Quilt Fabric and Batting
Choose a selection of fabrics that coordinate well together and suit the design you have in mind. Consider the color scheme, pattern scale, and fabric texture to create a visually appealing combination. Additionally, select a batting that will provide the desired level of warmth and thickness for your project.
Preparing the Quilt Top
Decide on a quilt design or pattern for your project. A simple patchwork pattern is a great place to start for beginners. Cut your selected fabrics into squares or rectangles, ensuring they are all the same size for uniformity. Lay out the fabric pieces on a flat surface to arrange them in a visually pleasing design. Once you’re satisfied with the layout, sew the fabric pieces together to form rows, and then sew the rows together to create the quilt top.
Quilting the Layers Together
Prepare the quilt sandwich by laying the quilt top, batting, and backing fabric on a flat surface. Use safety pins or basting spray to secure the layers together, ensuring they lay flat and smooth. Choose a quilting design, such as straight lines or simple geometric shapes, and stitch through all layers to secure them together. Alternatively, you can opt for tying the quilt by hand using decorative yarn or embroidery floss.
Adding the Binding
The binding is the fabric strip that finishes and secures the raw edges of the quilt. Measure and cut the binding fabric into strips, ensuring they are long enough to go around the entire quilt perimeter. Join the binding strips using diagonal seams to create one continuous strip. Prepare the binding by pressing it in half lengthwise, wrong sides together.
Starting in the middle of one side of the quilt, align the raw edges of the binding strip with the raw edges of the quilt, right sides together. Stitch along the edge using a quarter-inch seam allowance, mitering the corners to create crisp and neat corners. Continue stitching until you reach the starting point.
Finishing the Quilt
To finish the quilt, fold the binding over the raw edges to the back of the quilt, covering the stitching line. Pin or clip the binding in place, ensuring it overlaps the stitching line evenly. Hand-stitch the binding to the back of the quilt using a blind stitch or slipstitch, taking care to sew evenly and hide the stitches from the front. Once the binding is securely attached, press the quilt to give it a finished look.
Congratulations! You’ve completed a simple quilting project and created a beautiful and cozy quilt. Now you can enjoy the warmth and comfort of your handmade creation or gift it to someone special.
In conclusion, starting your sewing journey can be an exciting and fulfilling experience. By choosing the right projects, gathering the necessary supplies, and learning essential techniques, you’ll be well-equipped to embark on your first sewing adventure. From simple projects like drawstring bags and pillowcases to more advanced projects like skirts and quilts, there’s a wide range of creative possibilities to explore. Remember to take your time, practice regularly, and have fun with your sewing projects. Happy sewing!