So you’ve decided to take up sewing, but you’re not sure where to start. Don’t worry, we’ve got you covered! In this article, we’ll help you figure out what you should learn to sew first. With so many options and techniques out there, it can be overwhelming to know where to begin. But fear not, by the end of this article, you’ll have a clear idea of your first sewing project and be ready to dive into the wonderful world of sewing. Let’s get started!
Choosing the Right Sewing Machine
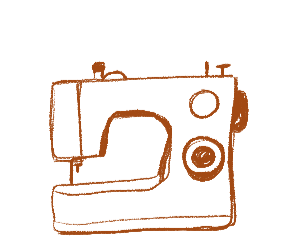
When you’re just starting out with sewing, choosing the right sewing machine can feel overwhelming. With so many options available, how do you know which one is right for you? It’s important to understand the different types of sewing machines before making a decision. There are mechanical sewing machines, electronic sewing machines, and computerized sewing machines.
Mechanical sewing machines are the most basic type and usually the most affordable. They rely on manual controls and dials for stitch selection and adjustments. Electronic sewing machines have added features like automatic stitch selection and a variety of built-in stitches. They are a step up from mechanical machines in terms of convenience and functionality. Computerized sewing machines are the most advanced. They have a wide range of features, such as LCD screens, programmable stitch sequences, and even embroidery capabilities.
Once you have an idea of the type of sewing machine you’re interested in, it’s time to think about the features you need. Do you plan on doing basic sewing or do you want a machine that can handle more advanced techniques? Consider features such as the number of built-in stitches, buttonhole capabilities, thread tension adjustments, and presser foot options. It’s also important to think about the sewing machine brand. Research popular sewing machine brands to find one that is known for making reliable and durable machines.
Essential Sewing Tools and Supplies
Having the right sewing tools and supplies is essential for successful sewing projects. While the specific tools you need may vary depending on the project, there are a few basic sewing tools that every beginner should have.
Firstly, you’ll need a good pair of fabric scissors. Invest in a pair that is sharp and comfortable to hold. You’ll also need pins to hold your fabric in place while sewing. Choose pins that are thin and sharp, so they don’t leave visible holes in your fabric. A pincushion or magnetic pin holder is a handy accessory to keep your pins organized and within reach.
Other basic sewing tools include a seam ripper for those inevitable mistakes, a tape measure for accurate measurements, and a marking tool to transfer pattern markings onto your fabric. A sewing gauge is useful for measuring small distances, and a hand sewing needle set will come in handy for any hand stitching you need to do.
In addition to these tools, you’ll also need sewing machine needles. Sewing machine needles come in different sizes and types, so it’s important to choose the right needle for your project. For lightweight fabrics, use a fine needle, and for heavier fabrics, use a thicker needle. It’s also important to change your needle regularly to ensure smooth and even stitches.
Lastly, make sure you have a good supply of essential sewing supplies such as thread in various colors, bobbins, and machine oil for maintenance. These supplies are the backbone of any sewing project and having them on hand will make your sewing experience much smoother.
When it comes to choosing fabric, opt for beginner-friendly fabrics like cotton or linen. These fabrics are easy to work with and don’t have too much stretch or slipperiness. Avoid fabrics like silk or lace until you’ve gained more confidence in your sewing skills.
Mastering Hand Stitches
While modern sewing machines are a great tool, learning hand stitches is still an essential skill for a well-rounded sewer. Hand stitches can be used for a variety of purposes, from finishing edges to attaching small details. Learning basic hand stitches will give you more flexibility in your sewing projects.
Start by learning the backstitch, the running stitch, and the slip stitch. The backstitch is a strong stitch used for seams that need extra reinforcement. The running stitch is a basic stitch used for simple seams or basting. The slip stitch, also known as the blind stitch, is a nearly invisible stitch used for hemming and attaching closures.
Practice these basic hand stitches on scrap fabric. Take your time and focus on creating even stitches with consistent tension. As you become more comfortable, you can experiment with more advanced hand stitches, such as the blanket stitch or the whip stitch.
Understanding when to use hand stitches is just as important as knowing how to execute them. Hand stitches are often used for delicate fabrics, finishing details, or securing small elements. With practice, you’ll gain confidence in your hand stitching skills and be able to incorporate them into your sewing projects.
Making Straight Seams
Sewing straight seams is one of the fundamental skills every sewist needs to master. Whether you’re sewing garments or home decor items, straight seams are the building blocks of many projects. To ensure straight stitching, you need to properly set up your sewing machine.
Begin by selecting a straight stitch on your machine. Adjust the stitch length to around 2-2.5mm, depending on your fabric and project. Test different stitch lengths on scrap fabric to find the one that gives you the desired result.
Before you start sewing, make sure the fabric edges are properly aligned. Pin them in place to prevent shifting while sewing. It’s also a good idea to sew with a guiding tool, such as a seam guide or a piece of washi tape, to help you keep the stitching straight.
Practice sewing straight lines on scrap fabric. Start by sewing slowly and aim to keep your stitching parallel to the edge of the fabric. As you gain more experience, you can increase your sewing speed while maintaining straight lines.
Once you feel confident in sewing straight seams, you can start applying this skill to simple projects. Start with easy projects, such as pillowcases or tote bags, that require sewing straight lines. Gradually work your way up to more complex projects that involve multiple straight seams.
Sewing Curved Seams
Sewing curved seams requires a slightly different approach than sewing straight seams. Curved seams are commonly found in garments, such as sleeves or necklines, and require attention to detail to ensure a smooth and professional finish.
To sew curved seams, begin by marking the seam line on your fabric. This can be done with tailor’s chalk or fabric markers. Secure the fabric layers together using pins or fabric clips, making sure the edges are properly aligned.
When sewing curved seams, it’s essential to sew slowly and carefully. Ease the fabric slightly with your fingers or use the curve of the presser foot to guide the fabric through the machine. If necessary, stop sewing and readjust the fabric if you notice any puckering or fabric distortion.
Practicing sewing curved seams on beginner-friendly projects is a great way to improve your skills. Choose projects that have gentle curves, such as simple skirt patterns or baby clothes. With practice, you’ll become more comfortable sewing curved seams and be able to tackle more advanced projects.
Adding Darts and Pleats
Darts and pleats are two techniques used to add shape and dimension to garments. Darts are folds in the fabric that taper into a point, creating shape and contour. Pleats, on the other hand, are folds that are pressed and stitched into place, adding fullness to a garment.
Understanding the purpose of darts and pleats is essential before starting to sew them. Darts are usually used to provide shape to fitted garments, such as bodices or skirts. They can be used to accommodate curves in the body or to create a more tailored fit. Pleats, on the other hand, are often used for decorative purposes or to add fullness to a garment without adding bulk.
To sew darts, start by marking the dart placement on your fabric. Use tailor’s chalk or fabric markers for accuracy. Fold the fabric along the marked line, right sides together, and pin it in place. Sew along the marked line, tapering to a point at the end. Press the dart flat, and if necessary, secure it with a few hand stitches at the point.
To create pleats, mark the pleat placement on your fabric. Fold the fabric along the marked line, right sides together, and pin it in place. Press the pleats with an iron to create crisp folds. Secure the pleats with a few stitches at the top of the fold to hold them in place.
Practicing and experimenting with darts and pleats on scrap fabric is a great way to improve your skills. Once you feel comfortable, you can incorporate darts and pleats into your sewing projects to add shape and interest to your garments.
Creating Basic Hems
Hemming is the process of finishing the raw edges of fabric to create a clean and polished look. It’s an essential skill for any sewist, as almost every garment or project requires some form of hem.
To create a basic hem, start by measuring the desired hem length and marking it with tailor’s chalk or fabric markers. Fold the fabric up along the marked line, wrong sides together, and press it with an iron to create a crisp fold. Pin the folded hem in place, making sure the fabric edges are aligned.
Depending on the fabric and project, you can choose from different techniques to sew the hem. For lightweight fabrics, a simple double-fold hem is often sufficient. Fold the raw edge under by ¼ inch, press it, and then fold it again by the desired hem width. Topstitch the folded edge close to the fold to secure the hem.
For heavier fabrics, a blind hem or a hand-sewn slip hem may be more suitable. These techniques create nearly invisible hems that add a professional touch to your sewing projects. Follow the instructions of your sewing machine or refer to online tutorials for detailed guidance on these techniques.
Applying hems to various garments is a great way to practice your hemming skills. Start with simple projects, such as aprons or napkins, that require basic hems. As you gain more confidence, you can tackle more complex projects that involve curved or layered hems.
Inserting Zippers
Zippers are common closures in garments and accessories, and learning how to insert them correctly is an important skill. There are different types of zippers available, such as invisible zippers, regular zippers, and exposed zippers. Understanding the different types and choosing the right zipper for your project is the first step.
Invisible zippers are often used for garments where you want the zipper to be hidden, such as dresses or skirts. Regular zippers are versatile and suitable for a wide range of projects. Exposed zippers are often used for decorative purposes and can add an interesting detail to your sewing projects.
Once you have chosen the right zipper, it’s time to learn how to insert it correctly. Start by marking the zipper placement on your fabric. Pin or baste the zipper in place, right sides together, making sure the teeth align with the fabric edges. Using a zipper foot on your sewing machine, stitch close to the zipper teeth, removing the pins or basting stitches as you go.
Practicing inserting zippers on scrap fabric is a great way to improve your skills. Sewing zipper pouches or small bags is an excellent project to practice zipper insertion. With practice, you’ll gain confidence in inserting zippers and be able to incorporate them into a wide range of projects.
Making Buttonholes
Buttonholes are essential closures used in garments and accessories that feature buttons. There are different types of buttonholes, such as machine-made buttonholes and hand-sewn buttonholes. Understanding the different types and when to use each one is crucial.
Machine-made buttonholes are often the most convenient option, especially if your sewing machine has a buttonhole foot. This foot allows you to create perfectly-sized buttonholes with minimal effort. Follow your sewing machine’s manual for instructions on how to use the buttonhole foot and stitch buttonholes.
Hand-sewn buttonholes are a more traditional option that can add a handmade touch to your sewing projects. They are often used in specialty fabrics or historical garments. Hand-sewn buttonholes require practice and patience but can result in beautiful and unique closures.
Practice making buttonholes on scrap fabric using your sewing machine. Adjust the settings, such as stitch length and width, to achieve the desired buttonhole size. Start with basic buttonholes and gradually advance to more complex ones.
Adding buttonholes to garments and accessories is a fantastic way to practice your buttonhole-making skills. Start with simple projects, such as a button-up shirt or a bag with a button closure. As you become more comfortable, you can experiment with different buttonhole placements and styles.
Sewing Basic Patterns
Sewing patterns are your roadmap to creating well-fitted garments. Choosing beginner-friendly sewing patterns is a great way to start your sewing journey. Look for patterns labeled as “easy” or “beginner” and read through the pattern instructions before starting.
Reading and understanding sewing pattern instructions is an essential skill. Take your time to familiarize yourself with the pattern pieces, layout, and construction steps. Pay attention to any symbols or special techniques mentioned in the instructions. If something is unclear, don’t hesitate to consult online tutorials or sewing forums for guidance.
Start sewing simple garments using patterns that require minimal adjustments or fitting. Follow the pattern instructions step by step, and don’t rush the process. Take your time to ensure accurate cutting and precise stitching. As you become more comfortable, you can slowly tackle more complex patterns and experiment with different fabrics and design variations.
Remember, sewing is a skill that takes time to master. Don’t be discouraged if your first few projects don’t turn out exactly as you envisioned. With practice and patience, you’ll become more confident in your abilities and be able to tackle more challenging sewing projects. Enjoy the process and have fun creating beautiful garments and accessories!