If you’ve recently taken up an interest in sewing but feel overwhelmed by the countless projects and possibilities, fear not! This article is here to guide you on what you should start sewing first. Whether you’re a complete beginner or just looking to refresh your skills, we’ll explore some easy and practical projects that will not only boost your confidence but also equip you with essential sewing techniques. So, grab your fabric and thread, because it’s time to embark on a sewing adventure!
Choosing the Right Materials
When it comes to sewing, one of the most important aspects to consider is choosing the right materials. Whether you’re a beginner or an experienced sewist, selecting the right fabric and thread can make all the difference in the outcome of your project.
Selecting the Fabric
When selecting fabric for your sewing project, it’s important to consider the type of garment or item you’re creating. Different fabrics have different properties and some may be more suitable than others for specific projects. For example, if you’re making a lightweight summer dress, you might want to choose a breathable cotton fabric. On the other hand, if you’re sewing a cozy winter coat, you might opt for a warm wool fabric.
Consider the drape, weight, and stretch of the fabric as well. Some projects require fabrics that drape beautifully, while others need fabrics with more structure. Additionally, consider the care instructions for the fabric. Some fabrics require delicate handling and may need to be dry cleaned, while others can be machine washed.
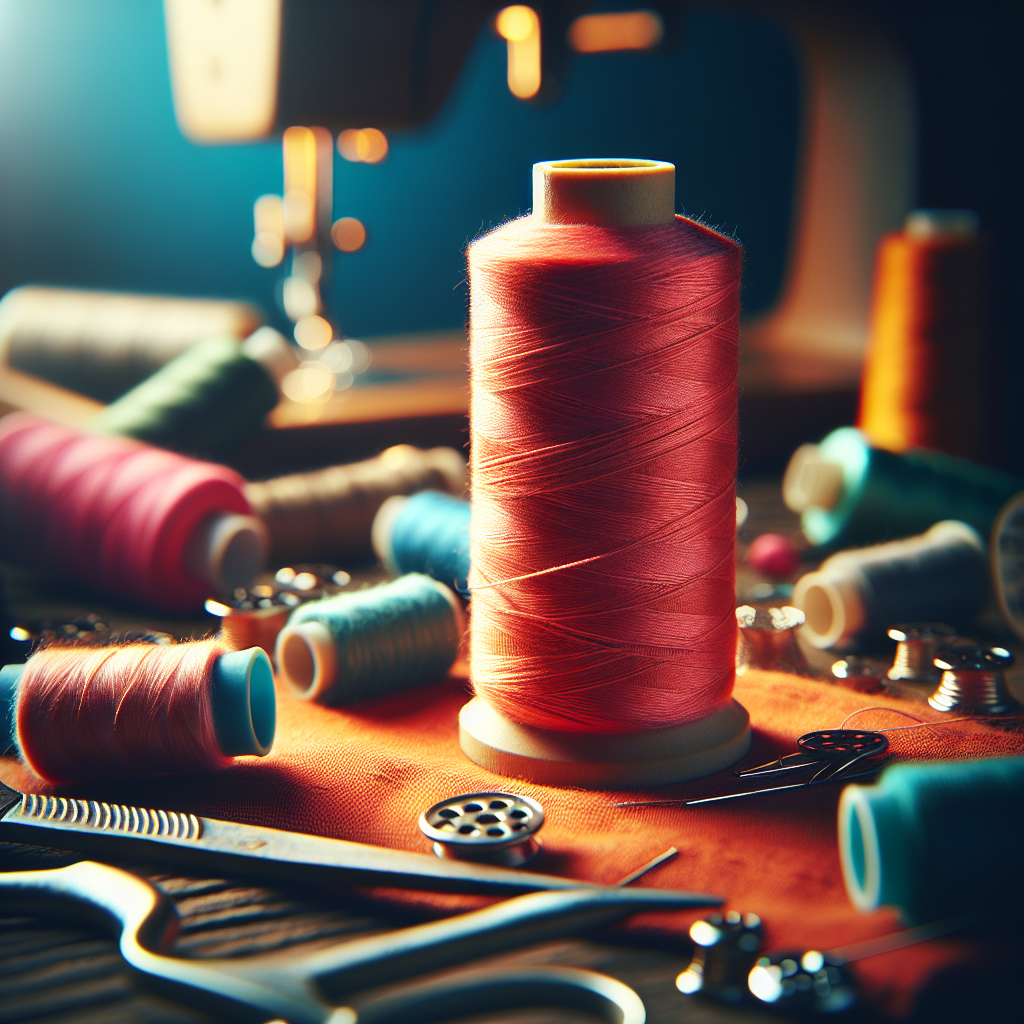
Choosing the Thread
Choosing the right thread is essential for ensuring the durability and longevity of your sewing projects. While it may be tempting to use any thread you have on hand, it’s important to select a thread that matches the weight and fiber content of your fabric.
Cotton thread is a popular choice for most general sewing projects, as it is strong and versatile. However, for more specialized projects such as sewing denim or knits, it’s recommended to use polyester thread, which has more stretch and durability.
When selecting thread, also consider the color. Choosing a thread that matches your fabric color will help create a seamless finish, while contrasting thread can be used for decorative purposes.
Getting the Necessary Tools and Accessories
In addition to fabric and thread, there are several tools and accessories that are essential for sewing. These tools will not only make your sewing process easier but will also help you achieve professional-looking results.
Some must-have tools include:
- Sewing machine: A good quality sewing machine will make your sewing experience much more enjoyable and efficient. Look for a machine that has a variety of stitch options and adjustable speed settings.
- Scissors: Invest in a pair of sharp fabric scissors for cutting fabric. It’s important to have separate scissors for fabric cutting to prevent dulling the blades.
- Pins and needles: These are essential for holding fabric pieces together before sewing. Choose pins with sharp points and needles that are suitable for the type of fabric you’re using.
- Seam ripper: Mistakes happen, and a seam ripper will become your best friend when you need to undo stitches.
- Measuring tools: A tape measure, ruler, and measuring gauge will help you take accurate measurements and achieve precise cuts.
- Iron and ironing board: Pressing your fabric and seams is a crucial step in achieving a professional-looking finish.
- Bobbins: Bobbins are used to hold the thread in the bobbin case of your sewing machine. Make sure to have a few extra bobbins on hand.
With these essential tools and accessories, you’ll be well-equipped to tackle any sewing project that comes your way.
Basic Sewing Techniques
Before diving into more complex projects, it’s important to familiarize yourself with some basic sewing techniques. These techniques will serve as the foundation for your sewing skills and allow you to build upon them as you progress.
Threading the Machine
Threading your sewing machine correctly is essential for smooth and hassle-free sewing. Each sewing machine will have its own specific threading instructions that you should follow. Generally, the thread will be guided through various tension discs, hooks, and guides before reaching the needle.
Take your time to carefully thread your machine, making sure the thread passes through all the necessary components. It can be helpful to consult your sewing machine manual or watch online tutorials specific to your machine model.
Winding a Bobbin
Before you can start sewing, you’ll need to wind a bobbin with thread. The bobbin is a small spool that holds the thread on the underside of the fabric while you sew. To wind a bobbin, place an empty bobbin on the bobbin winder and follow the instructions provided by your sewing machine manufacturer.
Ensure that the bobbin is wound evenly and tightly with thread. Once the bobbin is fully wound, insert it into the bobbin case and thread it through the necessary guides to prepare for sewing.
Using Different Stitches
Sewing machines come with a variety of stitch options, each serving a different purpose. Understanding and using different stitches will allow you to add decorative elements to your projects and sew different types of seams.
Some common stitches include:
- Straight stitch: This is the basic stitch used for most sewing projects. It creates a straight line of stitches and is often used for sewing seams or topstitching.
- Zigzag stitch: The zigzag stitch is used for finishing raw edges to prevent fraying. It can also be used for elastic insertion and sewing stretch fabrics.
- Decorative stitches: Many sewing machines come with a range of decorative stitches that can be used for embellishment. These stitches can add a personalized touch to your projects.
Experiment with different stitch settings on your sewing machine to understand their functions and explore the creative possibilities they offer.
Understanding Seam Allowance
Seam allowance is the amount of fabric between the edge of the fabric and the line of stitching. It is important to understand and follow the specified seam allowance for each sewing project to ensure that the pieces fit together correctly.
Standard seam allowances are usually ⅝ inch for clothing projects, but can vary depending on the pattern or project instructions. Use a seam gauge or ruler to measure and mark the correct seam allowance on your fabric before sewing.
Applying Pressure to the Machine
Applying the right amount of pressure to the machine while sewing is crucial for achieving even stitches and smooth sewing. Too much pressure can cause the fabric to pucker, while too little pressure can result in loose stitches.
When sewing, gently guide the fabric through the machine, allowing the feed dogs (the metal teeth under the presser foot) to move the fabric without excessive force. It’s important to find a balance between guiding the fabric and letting the machine do its work.
Using Pins and Clips
Pins and clips are essential tools for holding fabric pieces together before sewing. When pinning, place the pins perpendicular to the seam line and ensure that they are inserted through both layers of fabric. This will prevent the fabric from shifting as you sew.
Clips are a great alternative to pins, especially when working with thick fabrics or delicate materials that can be damaged by pinholes. They provide a secure hold and make it easier to maneuver the fabric under the presser foot.
Experiment with both pins and clips to find which method works best for you and your projects.
Simple Sewing Projects for Beginners
Now that you’re familiar with some basic sewing techniques, it’s time to put your skills to the test with some simple sewing projects for beginners. These projects are designed to help you practice your newly acquired skills and develop your confidence in sewing.
Sewing a Pillowcase
A pillowcase is a quick and satisfying beginner project that allows you to practice sewing straight lines and basic seam construction.
To make a pillowcase, you’ll need two pieces of fabric. Fold one piece in half with right sides together and sew the side and bottom seams using a straight stitch and the specified seam allowance. Repeat the process with the second piece of fabric. Then, place the two pieces of fabric together with right sides facing each other and sew the top seam.
Turn the pillowcase right side out, press it to remove any wrinkles, and insert a pillow. You can add a decorative trim or applique for an extra touch of personalization.
Making a Simple Tote Bag
A tote bag is a versatile and practical project that allows you to practice sewing seams, attaching handles, and constructing a basic bag shape.
Start by cutting two identical rectangles of fabric for the body of the tote bag. Place the rectangles on top of each other with right sides facing and sew along the side and bottom seams using a straight stitch and the specified seam allowance. Leave the top edge open.
Fold the top edge of the bag to the inside by about 1 inch and press it. Sew around the top edge to create a neat finish.
To make the handles, cut two long strips of fabric and fold them in half lengthwise with right sides facing. Sew along the long edge and turn them right side out. Attach the handles to the sides of the bag, making sure to reinforce the stitching for durability.
Finish by pressing the bag and giving it a final topstitch for a polished look.
Creating a Reversible Headband
A reversible headband is a fun and quick project that allows you to experiment with different fabrics and create a stylish accessory.
To make a reversible headband, cut two long rectangles of fabric, each about 3 inches wide. Place the rectangles with right sides facing and sew along the long edges using a straight stitch and the specified seam allowance, leaving the short edges open.
Turn the headband right side out and press it to create crisp edges. Tuck in the raw edges of the short ends and sew them closed.
Experiment with different fabric combinations and patterns to create a variety of stylish headbands to match your outfits.
Sewing a Basic Skirt
A basic skirt is a great beginner project for learning how to sew a waistband, insert a zipper, and create a garment.
Start by taking your waist measurement and adding a few inches for ease and seam allowance. Cut a rectangle of fabric to this measurement for the skirt front. Repeat the process for the skirt back.
Sew the side seams of the skirt front and back pieces using a straight stitch and the specified seam allowance. Finish the raw edges with a zigzag stitch or serger.
To create the waistband, cut a strip of fabric to the desired width and length, depending on your waist measurement. Fold the waistband in half lengthwise with right sides facing and sew along the short edge using a straight stitch. Then, fold the waistband in half widthwise with wrong sides facing and press it.
Attach the waistband to the top edge of the skirt, matching the raw edges, and sew them together using a straight stitch. Leave a small opening to insert the zipper.
Insert the zipper, following the manufacturer’s instructions, and sew the remaining portion of the waistband closed.
Try different skirt lengths, fabrics, and embellishments to create a variety of handmade skirts that reflect your personal style.
Building Your Sewing Skills
Now that you’ve completed some simple sewing projects, it’s time to build on your skills and tackle more challenging techniques. The following sections will guide you through various sewing techniques that will enhance your sewing abilities and expand your repertoire.
Sewing Straight Lines
Sewing straight lines is a foundational skill that is essential for most sewing projects. To sew straight lines, it’s important to maintain a steady speed and guide the fabric evenly under the presser foot.
Practice sewing straight lines on scrap fabric until you feel comfortable with the motion and rhythm. Use the markings on your sewing machine needle plate as a guide to help you sew accurately.
Stitching Curves and Corners
As you progress in your sewing journey, you’ll encounter projects that require sewing curves and corners. These can be challenging to sew neatly and accurately.
To sew curves, it’s important to take your time, pivot the fabric whenever necessary, and use your fingers or a pin to guide the fabric smoothly under the presser foot. For corners, it may be necessary to sew a few stitches diagonally across the corner to reinforce it and prevent unraveling.
Practice sewing curves and corners on scrap fabric to improve your technique and achieve clean and smooth results.
Working with Zippers
Zippers are commonly used in garments, bags, and other sewing projects. They can be intimidating for beginners, but with practice, you’ll find that inserting zippers is not as difficult as it seems.
There are different methods for inserting zippers, including centered zippers, lapped zippers, and invisible zippers. Each method has its own steps and techniques, so it’s important to follow the instructions specific to the type of zipper you’re using.
Start by practicing inserting zippers on scrap fabric, following tutorials or instructions to guide you. With time and repetition, you’ll become more comfortable and confident in handling zippers.
Adding Elastic
Elastic is commonly used to create gathers, provide comfort and fit, and add decorative elements to garments. Sewing with elastic requires some specific techniques to ensure a professional-looking finish.
When sewing with elastic, it’s important to choose the right type and width for your project. There are different types of elastic, including braided, knit, and fold-over elastic. Each type has its own characteristics and uses, so be sure to select the appropriate one for your project.
To sew elastic, start by measuring and cutting the elastic to the desired length. Attach the ends of the elastic together to form a loop. Then, distribute the gathers evenly by sewing along the elastic with a zigzag stitch, stretching the elastic as you sew.
Practice sewing with different types of elastic on scrap fabric to get a feel for the tension and appearance of the finished result.
Creating Buttonholes
Buttonholes are essential for garments that require closures. They can be intimidating for beginners, but with the right technique, you can achieve professional-looking buttonholes.
Most modern sewing machines have automatic buttonhole settings that make the process easier. Follow your sewing machine manufacturer’s instructions to set up the machine for buttonhole stitching.
To sew a buttonhole, mark the placement on your fabric and position the fabric under the presser foot. Start the buttonhole stitching and let the machine take care of the rest. Once the buttonhole is completed, carefully cut it open using small scissors or a seam ripper.
Practice sewing buttonholes on scrap fabric before attempting them on your final project. This will help you perfect your technique and ensure that the buttonholes are well-placed and neatly stitched.
Attaching Pockets
Pockets are functional and stylish additions to garments. Whether you’re sewing patch pockets, inseam pockets, or welt pockets, proper attachment is crucial for stability and functionality.
Before attaching the pockets, mark the pocket placement on your fabric according to the pattern instructions. This will ensure that the pockets are positioned correctly and symmetrically.
To attach the pockets, follow the pattern instructions for each specific pocket type. Use pins or clips to secure the pockets in place and sew along the edges using a straight stitch or another suitable stitch depending on the pocket style.
Take your time when sewing pockets, ensuring that they are securely attached and that the pocket openings are neat and smooth.
Introduction to Garment Sewing
Once you feel comfortable with basic sewing techniques and have completed some simple sewing projects, you may be ready to venture into garment sewing. Garment sewing allows you to create customized clothing items that fit your unique style and body shape.
Choosing a Simple Garment Pattern
When starting garment sewing, it’s important to choose a simple pattern that matches your skill level. Look for patterns labeled as “easy” or “beginner-friendly.” These patterns typically have fewer pieces and less complicated construction techniques.
Consider the style, fit, and fabric recommendations of the pattern. Choose a pattern that aligns with your personal style and that you’ll enjoy wearing. Additionally, pay attention to the recommended fabric types and weights for the best results.
Taking Accurate Body Measurements
One of the most crucial steps in garment sewing is taking accurate body measurements. Proper measurements ensure that the garment will fit well and flatter your body shape.
Use a flexible tape measure and have someone assist you in measuring various parts of your body, following the specific measurement guide provided by the pattern. Take your time to ensure that the measurements are precise and match the pattern’s sizing chart.
Refer to the pattern instructions for guidance on where and how to measure, as different patterns may require different measurements.
Cutting and Preparing the Pattern
Once you have chosen a garment pattern and taken your measurements, it’s time to cut out the pattern pieces and prepare them for sewing.
Place the pattern pieces on your fabric according to the layout guide provided in the pattern instructions. Pay attention to the grainline markings and fabric direction to ensure that the garment hangs correctly when worn.
Carefully cut out the fabric pieces, following the outlines of the pattern pieces. Transfer any necessary notches, darts, or markings onto the fabric using tailor’s chalk or a fabric marker.
Before sewing, it’s also important to finish the raw edges of your fabric to prevent fraying. You can use a serger, zigzag stitch, or other suitable finishing techniques depending on the fabric type.
Seam Finishes and Hemming
Seam finishes and hemming are essential steps in garment sewing that ensure a professional-looking and durable finish.
There are various seam finishing techniques, including zigzag stitching, serging, French seams, and bias tape finishes. The type of seam finish you choose will depend on the fabric type and the desired appearance of the finished garment.
Hemming refers to finishing the raw edge of a fabric by folding it over and stitching it in place. There are different hemming techniques, such as single or double-fold hems, blind hems, and rolled hems. Again, the technique you choose will depend on the fabric type and the desired finish.
Take your time when finishing seams and hemming, ensuring that the stitches are even and secure. Press the seams and hems as you go to create crisp and professional-looking results.
Fitting and Adjustments
Fit is a crucial aspect of garment sewing. Rarely will a pattern fit perfectly right out of the envelope, as each person’s body shape and measurements are unique.
When trying on the garment during the fitting process, pay attention to areas that may need adjustment, such as the bust, waist, hips, or sleeve length. Pin or baste the desired adjustments in place, and try on the garment again to ensure a better fit.
Common adjustments include adding or removing width, lengthening or shortening the garment, or making alterations to accommodate a larger or smaller bust or waist.
Continue making adjustments as needed until you are satisfied with the fit of the garment. Taking the time to properly fit and adjust a garment will result in a more comfortable and flattering end result.
Practicing Embellishment Techniques
Embellishment techniques allow you to add personal touches and unique details to your sewing projects. Whether you’re adding decorative elements to garments, accessories, or home décor items, these techniques allow you to showcase your creativity and enhance the overall look of your creations.
Applique
Applique is the process of attaching fabric cutouts onto the surface of another fabric, creating a decorative effect. This technique can be used to add patterns, shapes, or letters to garments, bags, or quilts.
To applique, start by cutting out the desired shapes from a contrasting fabric. Position the fabric shapes onto the base fabric, and secure them in place using pins or fusible webbing. Stitch around the edges of the fabric shapes using a straight stitch, a zigzag stitch, or a decorative stitch.
Experiment with different fabric shapes, colors, and stitching techniques to create unique applique designs.
Embroidery
Embroidery is the art of decorating fabric with stitches. It can be used to add delicate details, embellishments, or even whole designs to garments, accessories, or home décor items.
There are various embroidery stitches you can learn and practice, such as backstitch, satin stitch, French knots, and lazy daisy stitch. Each stitch creates a different effect and can be combined to create intricate designs.
Embroidery can be done by hand or with the help of an embroidery machine. Choose embroidery thread in colors that complement your fabric and experiment with different stitch patterns to add a personal touch to your sewing projects.
Adding Trims and Ribbons
Trims and ribbons can add a touch of elegance or playfulness to your sewing projects. They can be used as decorative accents, edging, or even as functional elements like drawstrings or straps.
When adding trims and ribbons, it’s important to choose the right width, color, and material that complement your fabric. Consider the overall design and style of your project and select trims and ribbons that enhance its aesthetic.
There are various ways to attach trims and ribbons, including sewing them along the edge, inserting them into seams, or creating loops and bows. Experiment with different techniques and placements to achieve the desired effect.
Creating Decorative Pockets
Pockets don’t have to be just functional; they can also be a canvas for your creativity. Adding decorative pockets to garments or bags can add visual interest and showcase your sewing skills.
To create decorative pockets, start by cutting out pocket pieces from a contrasting fabric or using the same fabric as the main garment. Consider using patterned or textured fabrics for added interest.
Once you have cut out the pocket pieces, experiment with decorative elements such as embroidery, applique, or trims. The pocket can serve as a canvas for your creativity, allowing you to add unique designs or patterns.
Attach the decorative pocket to the main garment or bag, making sure to reinforce the stitching for durability. Take your time to position the pocket symmetrically and sew it securely in place.
Using Piping or Cording
Piping or cording is a great way to add definition, structure, and visual interest to your sewing projects. It can be used along edges, seams, or as decorative accents.
To use piping or cording, start by cutting fabric strips on the bias or using pre-made piping. Fold the fabric strip in half lengthwise with wrong sides facing and insert the piping cord into the fold. Sew along the edge of the fabric, as close to the cord as possible.
Piping can be added to garments, bags, pillows, or any project that could benefit from a pop of color or definition. Experiment with different fabric and cord colors to achieve the desired effect.
Sewing Home Décor Items
Sewing home décor items allows you to personalize your space and create custom pieces that reflect your personal style. Whether you’re making curtains, cushion covers, table linens, or basic drapes, these projects offer endless possibilities for creativity.
Making Curtains
Curtains can add both functionality and style to your windows. By sewing your own curtains, you have the freedom to choose the fabric, length, and design to perfectly complement your home décor.
When making curtains, measure your windows and calculate the desired length and width of the curtains. Cut the fabric accordingly, leaving extra fabric for hems.
Sew the side hems and bottom hem of each curtain panel using a straight stitch and the specified seam allowance. Create a rod pocket at the top of each panel by folding over the fabric and sewing it down.
Experiment with different fabric patterns and textures to create curtains that match the overall aesthetic of your home.
Sewing Cushion Covers
Cushion covers are an easy and fun way to update the look of your living room or bedroom. By sewing your own cushion covers, you can easily change the design whenever you feel like refreshing your space.
To make cushion covers, measure the dimensions of your cushion insert and add a few inches for ease. Cut out two fabric pieces to these measurements, allowing for seam allowances.
Place the fabric pieces with right sides facing and sew along three sides using a straight stitch and the specified seam allowance. Leave one side open for inserting the cushion. Finish the raw edges with a zigzag stitch or serger.
Turn the cushion cover right side out and insert the cushion. Close the opening with hand stitching or topstitching using a coordinating thread color.
Get creative with different fabric patterns, trims, or applique to create unique and eye-catching cushion covers.
Creating Table Linens
Sewing table linens allows you to customize your dining experience and set the mood for special occasions or everyday meals. From tablecloths and placemats to napkins and table runners, there are endless options for creating beautiful table settings.
To make table linens, measure your table and decide on the desired dimensions for your tablecloth or placemats. Cut the fabric accordingly, leaving extra fabric for hems.
Sew the hems of the tablecloth or placemats using a straight stitch and the specified seam allowance. For added flair, consider adding decorative elements such as applique or trims.
Napkins can be made by cutting squares of fabric and sewing hems on each side. Experiment with different fabric patterns and colors to create a cohesive look.
Table runners can be made by cutting a long rectangle of fabric and sewing hems on each side. Consider adding decorative elements or embroidery to enhance the design.
Crafting Basic Drapes
Drapes are a stylish and functional addition to windows, providing privacy and light control. Sewing your own drapes allows you to customize the length, fabric, and design to suit your taste.
When making drapes, measure your windows and decide on the desired length and width of the drapes. Cut the fabric accordingly, leaving extra fabric for hems.
Sew the side hems and bottom hem of each drape panel using a straight stitch and the specified seam allowance. Create a rod pocket at the top of each panel by folding over the fabric and sewing it down.
Experiment with different fabric patterns, textures, and linings to create drapes that complement your room décor and provide the desired level of light control.
Exploring Quilting Techniques
Quilting is a traditional sewing technique that allows you to create beautiful and functional fabric creations. From patchwork quilting to foundation piecing and free-motion quilting, there are various quilting techniques to explore and experiment with.
Patchwork Quilting
Patchwork quilting involves sewing small fabric pieces together to create a larger fabric composition. This technique allows you to create intricate patterns and designs with fabric.
To start a patchwork quilt, select fabric pieces in different colors and patterns. Cut them into squares, rectangles, or other desired shapes. Arrange the fabric pieces in a pleasing pattern, ensuring that the edges align.
Sew the fabric pieces together using a ¼ inch seam allowance, making sure to press the seams as you go. Continue adding fabric pieces until the desired size of the quilt top is achieved.
Add batting and a backing fabric to the quilt top, and secure all layers together by quilting through the layers with straight lines or other quilting designs. Finish the quilt by adding binding to the edges.
Quilting is a time-consuming but rewarding process that allows you to create heirloom-quality pieces that can be cherished for generations.
Foundation Piecing
Foundation piecing is a technique that allows you to accurately sew small fabric pieces onto a foundation or base fabric. This technique is great for achieving precise and intricate designs.
To foundation piece, start by cutting a foundation fabric to the desired size and shape. Layer the foundation fabric with the fabric pieces you want to sew onto it, ensuring that the right side of each fabric piece is facing up.
Sew the fabric pieces onto the foundation fabric, using a straight stitch and the specified seam allowance. Flip the fabric pieces over and press them flat.
Continue adding fabric pieces, flipping, and pressing until the foundation fabric is covered completely. Trim any excess fabric from the edges of the foundation fabric.
Foundation piecing is a versatile technique that can be used for creating blocks, borders, or even entire quilts. Experiment with different fabric combinations and designs to create unique and visually stunning pieces.
Quilting Basics
Quilting basics refer to the techniques and methods used to quilt the layers of the quilt together. Quilting stitches hold the quilt top, batting, and backing fabric securely together, adding texture and dimension to the finished quilt.
There are various quilting methods, including hand quilting, machine quilting, and long-arm quilting. The method you choose will depend on your skill level, available equipment, and desired quilt design.
Hand quilting involves stitching through all layers of the quilt using a needle and thread. This method is time-consuming but allows for intricate and detailed quilting designs.
Machine quilting involves using a sewing machine to quilt the layers together. This method is faster and more efficient than hand quilting and offers a wide range of design options.
Long-arm quilting is performed using a specialized quilting machine that can handle large quilts. This method is often used for quilts that are too large or intricate to quilt on a regular sewing machine.
Experiment with different quilting designs, such as stippling, straight lines, or free-motion quilting, to add texture and interest to your quilting projects.
Binding and Finishing
Binding is the final step in quilting and adds a finished edge to the quilt. It involves sewing fabric strips around the raw edges of the quilt to enclose and protect the layers.
To bind a quilt, cut fabric strips to the desired width and length. Join the strips together using diagonal seams to create a continuous strip that is long enough to go around the entire quilt.
Fold the strip in half lengthwise with wrong sides facing and press it. Align the raw edges of the strip with the raw edges of the quilt, starting in the middle of one side.
Sew the binding strip to the quilt, using a ¼ inch seam allowance and leaving a small opening for joining the ends later. When you reach a corner, fold the binding strip diagonally and continue sewing along the next side.
After completing the first round of sewing, join the ends of the binding strip together by trimming them, overlapping, and sewing them together. Finish sewing the rest of the binding to the quilt.
Fold the binding strip over the raw edges of the quilt and hand stitch it to the back of the quilt using an invisible or decorative stitch.
Binding gives a polished look to the quilt, providing a neat and durable finish. Experiment with different binding widths and fabric colors to enhance the overall design of your quilt.
Sewing for Children
Sewing for children is a rewarding and fun way to create personalized clothing, toys, and accessories. Whether you’re sewing baby bibs, children’s clothing, soft toys, or hair accessories, these projects allow you to unleash your creativity and make one-of-a-kind items for the little ones in your life.
Sewing Baby Bibs
Baby bibs are a practical and thoughtful gift for new parents or a great addition to your own baby’s wardrobe. They are quick and easy to sew and require minimal fabric and supplies.
To sew baby bibs, cut out the desired bib shape from fabric, making sure to include extra fabric for hems and ties. Place the fabric with right sides facing and sew along the edges, leaving a small opening for turning it right side out.
Clip the curves and corners, turn the bib right side out, and press it flat. Topstitch around the edge of the bib, closing the opening as you go.
To create the ties, cut fabric strips and sew them together to create long strips. Attach the ties to the bib at the top corners.
Experiment with different fabric patterns, colors, and even waterproof fabrics to create unique and functional baby bibs.
Making Children’s Clothing
Sewing children’s clothing allows you to create custom and stylish garments that fit perfectly. From dresses and shirts to pants and skirts, there are endless options for sewing adorable outfits for children.
Choose a children’s clothing pattern that matches your child’s size and style preferences. Consider the fabric recommendations, closures, and ease to ensure a successful sewing experience.
Cut out the fabric according to the pattern pieces and follow the sewing instructions provided. Take your time to sew accurately and finish the seams neatly.
Experiment with different fabric colors, patterns, and trims to create unique and personalized garments for your child or as gifts for other children.
Creating Soft Toys
Soft toys are beloved companions for children and can be treasured for years to come. Sewing your own soft toys allows you to customize their design, size, and fabric to suit your child’s preferences.
To create a soft toy, start by selecting a toy pattern that appeals to you. Transfer the pattern pieces onto your fabric and cut them out. If the fabric has a right and wrong side, make sure to cut the pieces accordingly.
Sew the toy pieces together following the pattern instructions, ensuring that you leave an opening for turning and stuffing the toy. Clip the curves and corners, turn the toy right side out, and press it lightly.
Stuff the toy with polyester fiberfill or another suitable stuffing material, distributing it evenly and firmly. Hand stitch the opening closed using a slip stitch or ladder stitch.
Experiment with different fabric textures, colors, and patterns to create unique and cuddly soft toys that will bring joy to children.
Crafting Hair Accessories
Hair accessories are a fun and practical way to add a touch of style to your child’s outfit. From bows and headbands to hair ties and clips, sewing your own accessories allows you to customize them to match any outfit or occasion.
To make hair accessories, select a design or pattern that suits your child’s style. Cut the fabric pieces according to the pattern and assemble them by sewing or gluing them together.
Add clips or elastic to the hair accessories as needed to ensure that they stay securely in place.
Experiment with different fabric types, colors, and trims to create a variety of hair accessories that can be mixed and matched with your child’s outfits.
Working with Patterns
Working with patterns is an essential skill for any sewist. Patterns provide instructions and guidance for creating garments and other sewing projects and allow you to achieve consistent and professional results.
Understanding Pattern Envelopes
Pattern envelopes contain important information and details about the sewing project. They typically include a description of the project, fabric recommendations, a sizing chart, and other important instructions.
Take the time to read through the information provided on the pattern envelope before starting your sewing project. This will ensure that you have the necessary supplies, understand the fabric requirements, and know your size.
Reading and Interpreting Instructions
Pattern instructions guide you through each step of the sewing process. They provide detailed explanations, illustrations, and diagrams to help you understand the construction techniques and achieve the desired result.
When reading pattern instructions, take your time to read each step carefully. Familiarize yourself with any unfamiliar terms or techniques before starting. If necessary, consult online tutorials or sewing references to clarify any confusing instructions.
Follow the instructions in the order provided and check off each step as you complete it. This will help you stay organized and avoid mistakes.
Pattern Alterations and Adjustments
Patterns are drafted based on standard measurements, but everyone’s body shape is unique. It’s common to have to make alterations or adjustments to patterns to ensure a better fit.
To alter a pattern, start by comparing your measurements to the pattern’s sizing chart. Identify any areas that may require adjustment, such as bust, waist, or hip measurements.
Use pattern alteration techniques such as adding or removing width, lengthening or shortening pattern pieces, or adjusting darts or seams.
Take your time when making these adjustments and experiment with making a muslin or practice garment to test the fit and make further adjustments if needed.
Matching Prints and Fabrics
When working with prints or multiple fabrics in a project, it’s important to pay attention to fabric placement and pattern matching. This ensures that the finished project looks cohesive and professional.
Before cutting out your fabric, lay out the pattern pieces on the fabric and experiment with the placement to achieve the desired effect. Consider how the fabric pattern or print will look when the project is complete, and adjust the positioning accordingly.
For projects that require multiple fabric pieces, pay attention to aligning patterns or prints at seams and other visible areas. This will create a seamless and visually pleasing finished project.
Take your time when cutting and sewing to ensure that the fabric patterns align correctly. Use pins or basting stitches to hold the fabric pieces together before sewing to ensure that the patterns match.
By carefully considering fabric placement and pattern matching, you can elevate the overall look of your sewing projects and create visually appealing and cohesive designs.
As you embark on your sewing journey, remember to have fun and embrace the process of learning and improving your skills. Sewing is a creative and rewarding hobby that allows you to express yourself while producing functional and beautiful items. With practice, patience, and a willingness to learn, you’ll be amazed at what you can achieve. Happy sewing!